Array ( [0] => 280 [ID] => 280 [1] => 1 [TYPEID] => 1 [2] => 0 [SECTIONID] => 0 [3] => project-details [MOD_NAME] => project-details [4] => [TITLE] => [5] => Project Details [META_TITLE] => Radiant Neon to Make Autumn Leaves Card [6] => [META_DESCRIPTION] => Fun and bright, this card can be used for both spring and fall. [7] => [META_KEYWORDS] => [8] => [BUTTON_TITLE] => [9] => [BODY] => [10] => [BODY_SIDE] => [11] => [MODULE_PROCESSING] => [12] => [MODULE_META] => [13] => project-details-head.php [MODULE_HEAD] => project-details-head.php [14] => project-details-body.php [MODULE_BODY] => project-details-body.php [15] => [MODULE_SIDE] => [16] => 0 [TOP_ORDER] => 0 [17] => 0 [HITS_UNIQUE] => 0 [18] => 0 [HITS_REPEAT] => 0 [19] => 0 [ROBOT_HITS] => 0 [20] => 0000-00-00 00:00:00 [LASTVIEWED] => 0000-00-00 00:00:00 [21] => 0000-00-00 00:00:00 [ROBOT_LASTVIEWED] => 0000-00-00 00:00:00 [22] => 0.70 [PRIORITY] => 0.70 [23] => 1 [SITEMAP] => 1 [24] => 1 [ACTIVE] => 1 [25] => 1 [DISPLAY_TITLE] => 1 [26] => 0 [SSL_MODE] => 0 [27] => 0 [EDITABLE] => 0 [28] => 0 [DELETABLE] => 0 [29] => 2013-11-05 00:00:00 [LASTUPDATED] => 2013-11-05 00:00:00 [30] => 2013-11-05 00:00:00 [CREATED] => 2013-11-05 00:00:00 )
Imagine Crafts
LearnMakeCommunityShop

Radiant Neon to Make Autumn Leaves Card

Fun and bright, this card can be used for both spring and fall.


Radiant Neon to Make Autumn Leaves Card
  1. Cut the following pieces:  yellow mustard card base to 4.25″ x 5.5″; white cardstock piece to 2″ x 5.5″; shimmer gold to .5″ x 5.5″.
     
  2. Place the Leaves stencil over the white cardstock piece.  Using an InkBlusher, fill in most of the leaves with Electric Yellow.
     
  3. Highlight the edges of the leaves with Electric Green.
     
  4. Once the Radiant Neon inks have dried, spray with Sheer Shimmer Spritz Frost.
     
  5. Place stencil onto the mustard yellow cardstock.  With an InkBlusher, color design with VersaMark.
     
  6. Add clear embossing powder to inked leaves image and heat set.
     
  7. Punch a 2″ circle from white cardstock and a 1.75″ circle from shimmer gold cardstock; adhere gold circle to larger circle.
     
  8. Adhere gold strip to edge of white cardstock.
     
  9. Adhere the circles to the back of the white cardstock with about a 1/2″ of the circle showing, then add the white cardstock panel to the left side of card.
     
  10. Round top right and bottom right corners with punch.
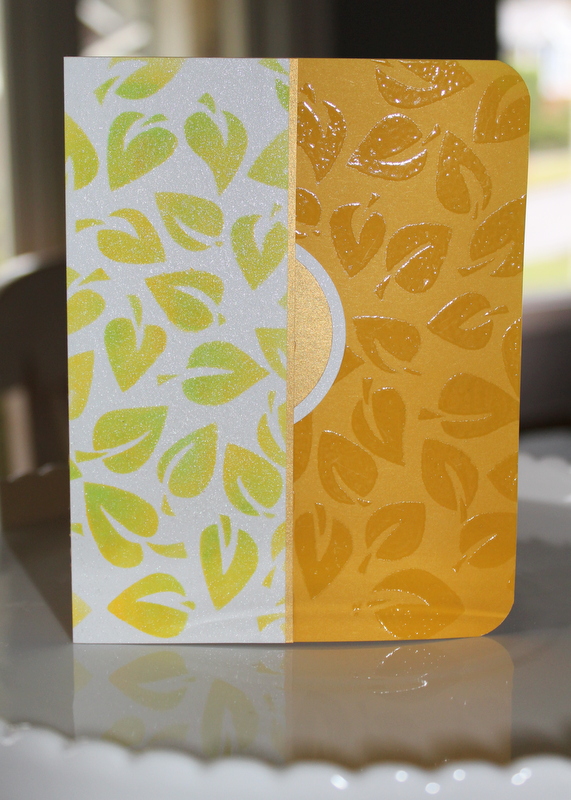
by Maureen Cronin

Difficulty

Immediate

Time

1 hour

Materials Needed

From IMAGINE Crafts/Tsukineko:

Miscellaneous:

  • Crafters Workshop: Leaves stencil
  • Cardstock: yellow mustard, shimmer gold, white
  • 2″ Circle punch
  • 1.75″ circle punch 
  • Corner punch 
  • Heat gun 
  • Adhesive


Sign up for our newsletter
Facebook Pinterest Twitter YouTube Vimeo