Array ( [0] => 280 [ID] => 280 [1] => 1 [TYPEID] => 1 [2] => 0 [SECTIONID] => 0 [3] => project-details [MOD_NAME] => project-details [4] => [TITLE] => [5] => Project Details [META_TITLE] => StazOn Studio Glaze for a Steampunk Parisian Master Board [6] => [META_DESCRIPTION] => StazOn Studio Glaze for a Steampunk Parisian Master Board [7] => [META_KEYWORDS] => [8] => [BUTTON_TITLE] => [9] => [BODY] => [10] => [BODY_SIDE] => [11] => [MODULE_PROCESSING] => [12] => [MODULE_META] => [13] => project-details-head.php [MODULE_HEAD] => project-details-head.php [14] => project-details-body.php [MODULE_BODY] => project-details-body.php [15] => [MODULE_SIDE] => [16] => 0 [TOP_ORDER] => 0 [17] => 0 [HITS_UNIQUE] => 0 [18] => 0 [HITS_REPEAT] => 0 [19] => 0 [ROBOT_HITS] => 0 [20] => 0000-00-00 00:00:00 [LASTVIEWED] => 0000-00-00 00:00:00 [21] => 0000-00-00 00:00:00 [ROBOT_LASTVIEWED] => 0000-00-00 00:00:00 [22] => 0.70 [PRIORITY] => 0.70 [23] => 1 [SITEMAP] => 1 [24] => 1 [ACTIVE] => 1 [25] => 1 [DISPLAY_TITLE] => 1 [26] => 0 [SSL_MODE] => 0 [27] => 0 [EDITABLE] => 0 [28] => 0 [DELETABLE] => 0 [29] => 2013-11-05 00:00:00 [LASTUPDATED] => 2013-11-05 00:00:00 [30] => 2013-11-05 00:00:00 [CREATED] => 2013-11-05 00:00:00 )
Imagine Crafts
LearnMakeCommunityShop

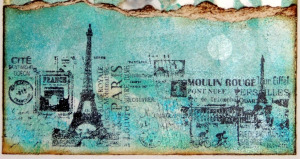
StazOn Studio Glaze for a Steampunk Parisian Master Board

As fall begins and In the dead of winter my thoughts often drift to spring time. What better place to be in the spring than Paris? For this card I used the new StazOn Studio Glaze product to mimic the beautiful sky colors seen only in the city of light.


StazOn Studio Glaze for a Steampunk Parisian Master Board

Directions

  1. Cut white cardstock 6” by 10”, fold in half. Ink outer edge of card base with StazOn Spiced Chai.
  2. Cut two pieces of glossy cardstock each measuring 5 ½” by 4 ½”.
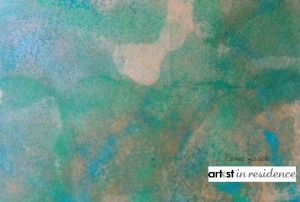
  3. Dot sponge blusher with two bright colors of StazOn Studio Glaze, one neutral color and one metallic color; apply a small amount of rubbing alcohol to blend the colors.
  4. Tap the sponge all over one sheet of the glossy paper turning the sponge with each tap; this will result in a marbleized effect.  Dry with heat gun.
AIRsJan2015 105

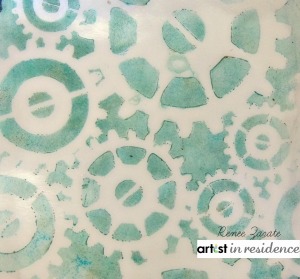
  1. Using a craft mat, tape a stencil on top of the second sheet of glossy cardstock.
  2. On a fresh InkBlushers sponge apply a small amount of StazOn Studio Glaze in different colors than the first, activate the blending with a small amount of rubbing alcohol; tap through the stencil to create an open pattern.  Lift the stencil straight up, dry inked pattern with heat gun.
AIRsJan2015 103


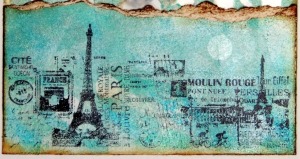
  1. Stamp on both papers with StazOn Jet Black ink.
  2. Cut the stenciled piece of paper to fit card, glue to card.  Cut and tear the solid marbleized paper to fit bottom section of card inking the edges with Memento LUXE Toffee Crunch ink.  Dry and adhere to bottom portion of the top panel.
AIRsJan2015 006

  1. Die cut butterflies from marbleized paper, adhere to card.
  2. Cut shipping tag, stamp and glue to card allowing short strings to dangle

.AIRsJan2015 106

by Renee Zarate

Difficulty

All Skill Levels

Time

45 min + dry time

Materials Needed

Imagine Crafts/Tsukineko:

Other:

  • Memory Box: Precious Butterflies and Pippi Butterfly dies
  • Crafter’s Companion: French Travels stamps
  • IndigoBlu: Crackle from Alice I Collection
  • Inkadinkado: Dawn Houser Collection
  • Sizzix: Big Kick
  • Artistcellar Stencils:  Steampunk Series~ Apparatus
  • Miscellaneous:  heat gun, shipping tag, rubbing alcohol (used as a blender), cutting tool, 3-in-1 adhesive, glossy cardstock, white cardstock folded to make a 5” by 6” card


Sign up for our newsletter
Facebook Pinterest Twitter YouTube Vimeo