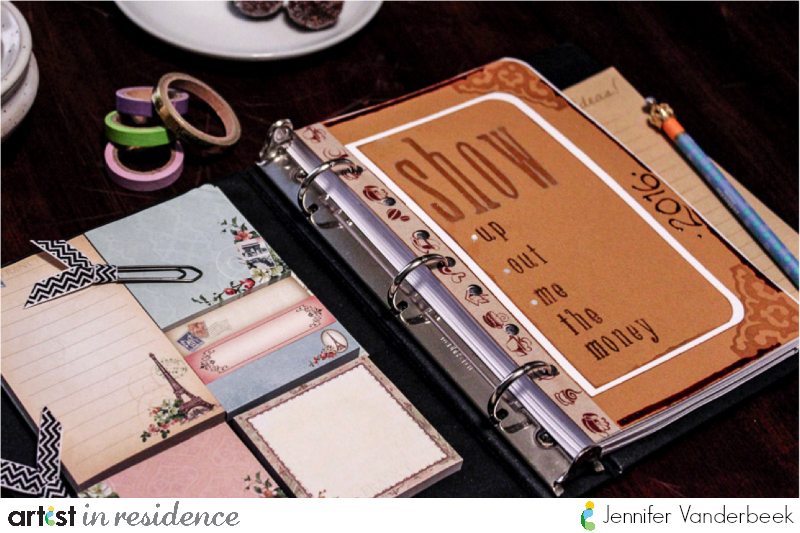
For the past four years I’ve been picking a single word that is my guide for the next 12 months. I like to put this word some place I’m going to see it a lot, so my planner is the perfect place to showcase it. The paper planner community has been growing by leaps and bounds, lately, and custom dashboards are a great way to personalize a planner.

Directions:

Step 1.
Stamp your one word onto the top layer of craft cardstock with the VersaMark Dazzle pad in Champagne and cover with Imagine Crafts clear embossing powder. This lets the sparkle from the Dazzle pad show through while also highlighting your chosen word. Emboss with a heat tool.

Step 2.
Stamp any supporting words under your one word in StazOn Spiced Chai. I like to elaborate on ways the word pertains to me, so “show up” (being present), “show out” (in terms of putting my best foot forward), and “show me the money” (for my business goals) are all ways I want to put show into play for 2016.

Step 3.
Edge each piece of cardstock. Use the VersaMark Dazzle pad in Champagne for the craft card stock and the StazOn Spiced Chai for the white matting layer. Stamp the corner design elements on the base cardstock layer with the champagne VersaMark Dazzle pad.

Step 4.
Glue your layers together; position the top layers of card stock so you have room to punch holes along the spine.

Step 5.
Apply washi tape (to both decorate and reinforce) to the spine edge of the dashboard and punch holes to fit your binder.

Step 6.
Embellish your dashboard with some flat-friendly options. Add bullet points with StazOn Studio Glaze in Cotton White and your year and other edge decorations with the Irresistible Pico Embellisher in Lilac Posies. Both of these add dimension and depth but not so much that it creates an uneven surface when you’re writing in your planner.

Step 7.
Outline your one word with a silver pen to make it stand out a bit more.
SUPPLY LIST
Imagine Crafts featuring Tsukineko:
Other