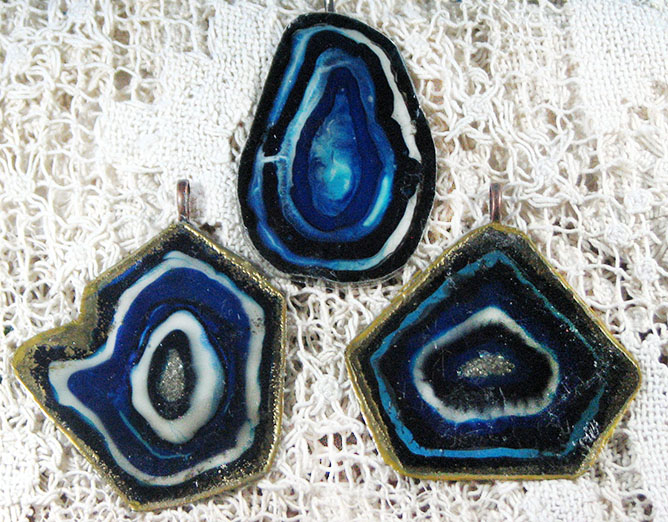
How to make my own Faux Blue Agate Slices with Imagine IrRESISTibles and Tsukineko products. These gems are perfect to use as accents on scrapbook layouts, journal pages, cards, and even as a necklace. This project takes 2 full days to complete.

Blue is my favorite color so when I found out that the Imagine color of the month was Lapis I was thrilled. Not just because I like blue but because I had been experimenting with how to make my own Faux Blue Agate Slices. I had tried all sorts of combinations using various materials for the base and mediums to color it. Recently, I found an excellent combination with mica slices, Imagine IrRESISTibles and Tsukineko products. These gems are perfect to use as accents on scrapbook layouts, journal pages, cards, and even as a necklace. This project takes 2 full days to complete, so without further delay let’s get started!
Directions

Select a piece of natural mica and split it into multiple pieces. Mica comes in all shapes and sizes. You will need two pieces for each agate slice. Keep in mind that the slices you select should be fairly thin and translucent. Select a thicker piece for the base and a thinner secondary piece for the final cover. Once you have selected these pieces, ink the edges with the VersaMark inkpad, dip into Gold Embossing Powder and heat emboss.

Apply IrRESISTibles and StazOn Studio Glaze to create the rings inside the faux stone. Starting with one color and one ring at a time, apply Danube Blue, Electric Blue and Wedding Dress irRESISTible Pico Embellishers as well as Blue Hawaii, Midnight Blue, Cotton White and Jet Black StazOn Studio Glaze. Work quickly to prevent the mediums spreading.

Continue until all the rings are filled toward the center. When you reach the center of the piece, fill it in with Clear irRESISTible Pico Embellisher and silver glass glitter. This will give the illusion of crystals in the center of a geode type agate. If desired, you may choose to swirl the mediums around a bit to imitate more intricate blue agate designs. Let the mediums dry overnight.

Once the piece has dried the resemblance to a real piece of blue agate will be amazing. Since mica was used as the base material you also have the option of choosing which side to call the front as you can see from the photos of a single Faux Blue Agate Slice above. These pieces can be used for necklaces but due to the fragile layers of the mica, the back of the slice will need to be stabilized. I applied a layer of Clear irRESISTible Pico Embellisher to the entire back of the slice and let it dry for 48 hours. I have found that the thinner consistency of the Pico Embellisher finds its way between the layers and binds them together. Other mediums will work for this process as well. Creating these faux agates was a time-consuming project with 2 full days of dry time, but the finished result was well worth the wait!