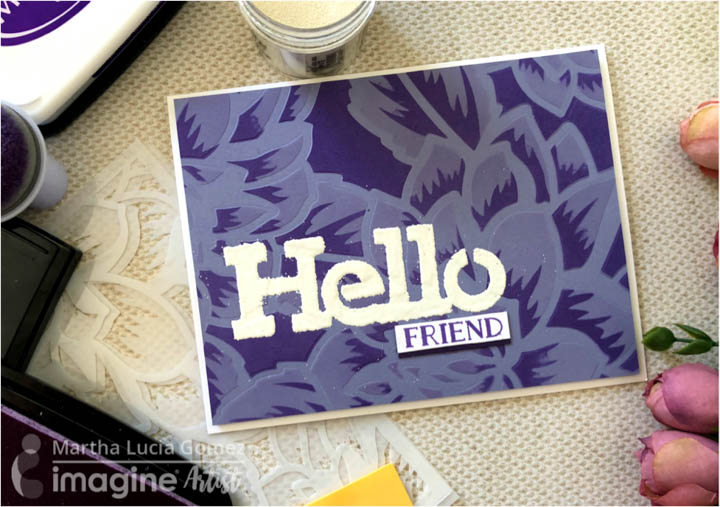
Layering stencils are trending now and we can create beautiful designs and make techniques with the different patterns.
Hello Fellow Crafters! Today, I am sharing some of my favorite stencil techniques with you! Layering stencils are trending now and we can create beautiful designs and make techniques with the different patterns. I am sharing an all textured card with a “Hello Friend” greeting. This month our challenge is stencils and the Color of the Month is Lavender.
Skill: Intermediate
Time: 30 minutes
Directions
Step 1
Select the color of cardstock and the stencils that you want to use. I am using Wisteria Wonder cardstock and the Layering Dahlia A & B Bundle Stencil from Altenew. Use the layers with different colors of ink. In my sample, I am using Memento Ink in Lulu Lavender and Grape Jelly. Apply the soft color on the stencil with more free areas and the dark color on the detailed stencil. To create the first layer of texture, place the stencil over the stenciled layer in the corresponding place.
Step 2
Create a special sandwich on your big shot to make the embossing. Remember that the pressures of cutting machines are different so you need to test and listen to your version. In my big shot the correct sandwich is:
• Closed Platform
• Rubber Pad
• A piece of cardstock (shim)
• Stenciled card layer
• Stencil
• Embossing Plate
Paste the ensemble sandwich easily through your die cut machine to emboss the stencil design and voila, you will have the first textured.
Step 3
Now it’s time to create the traditional embossing over your card. To make this I am using a Stencil Word from Jillibean Soup. Secure the stencil over the stenciled layer. Apply VersaMark directly with the ink pad over the “Hello”. Remove the stencil and cover the stamped word with Embossing Powder in White. Melt the powder with the heat tool. Paste the stenciled layer over a whisper white card base. Stamp a complement of the word and paste it over the card with On Point Glue.


